
This page will guide you to create your Facebook (Meta) app and then integrate “The WhatsApp Cloud Messaging Platform” in spyn PRO to start sending whatsapp messages both automatically and manually.
Things to note before you begin
- Whatsapp requires you to create an account on their Meta (facebook) developer platform followed by adding a mobile number that does not have a whatsapp account.
- Whatsapp will charge you for the conversations you start with your client. Click here to view the pricing.
- Messages via the app will be sent automatically using this number. You will receive replies to this message on the whatsapp platform we have added in the Menu.
- While you may delete a current whatsapp account associated with a number and then use that number, you should do this only if you are ok to lose messages sent earlier.
Follow the below 5 steps to set up your WhatsApp account for sending messages. Contact our support number +91 97022 44567 via Whatsapp for further details.
Step 1
Step 2
- Create a Meta (Facebook) App:
- Go to developers.facebook.com > My Apps > Create App
- Select the “Business” type and follow the prompts on your screen.
- Scroll down the list of products on the “Add products to your app” screen and select “WhatsApp” to set up your app.
- Now WhatsApp is visible in the Product List and one test number is assigned to you (Product> WhatsApp> Getting Started).
Step 3
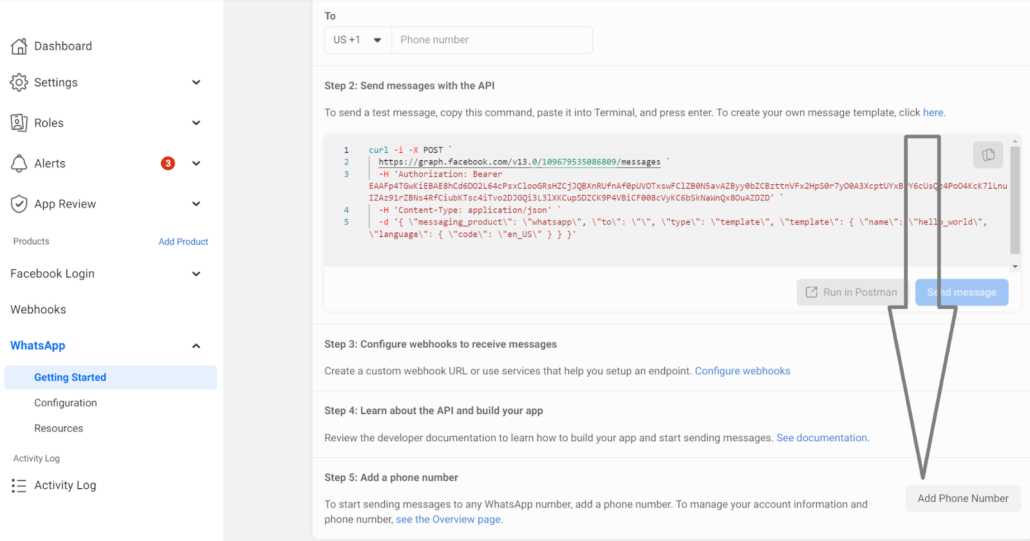
- Add Number: Product> WhatsApp> Getting Started
- Follow the steps and verify the number
- Add the webhook url as https://wa.spyn.co/v1/message/whatsapp-webhook. For token, please get in touch with our support team.
Step 4
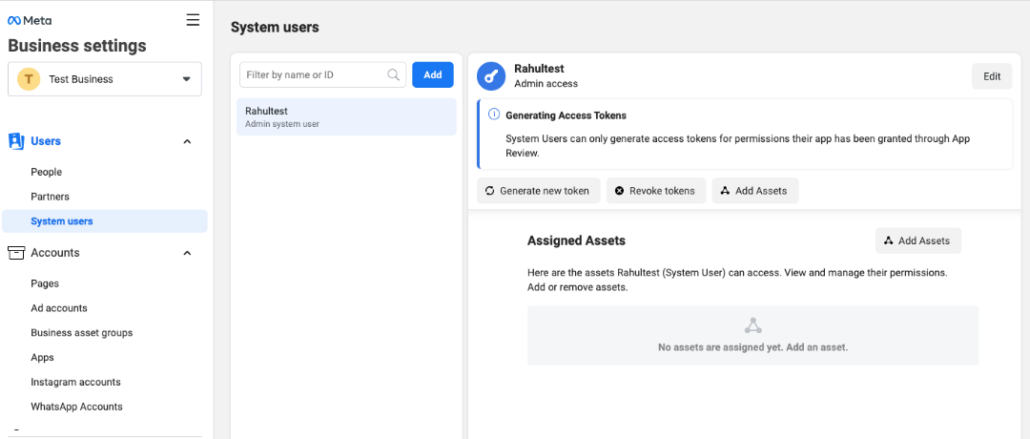
- Visit https://business.facebook.com > Settings > Business Settings
- In Side Menu User>> System Users >Add
- Enter Name and in System, User Role select “Admin”.
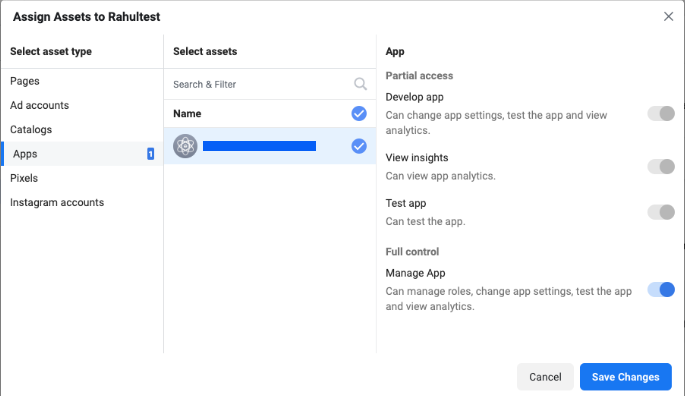
- Add Asset
5. Assign assets and enable the manage app option
6. Now, click on Generate Token
7. When you give the permission, make sure you give these two permissions a)“WhatsApp_business_management”
b)“WhatsApp_business_messaging” to generate the token for WhatsApp Business
8. Copy this Generated token.
Step 5
- Login to SpynPRO and Go to Settings
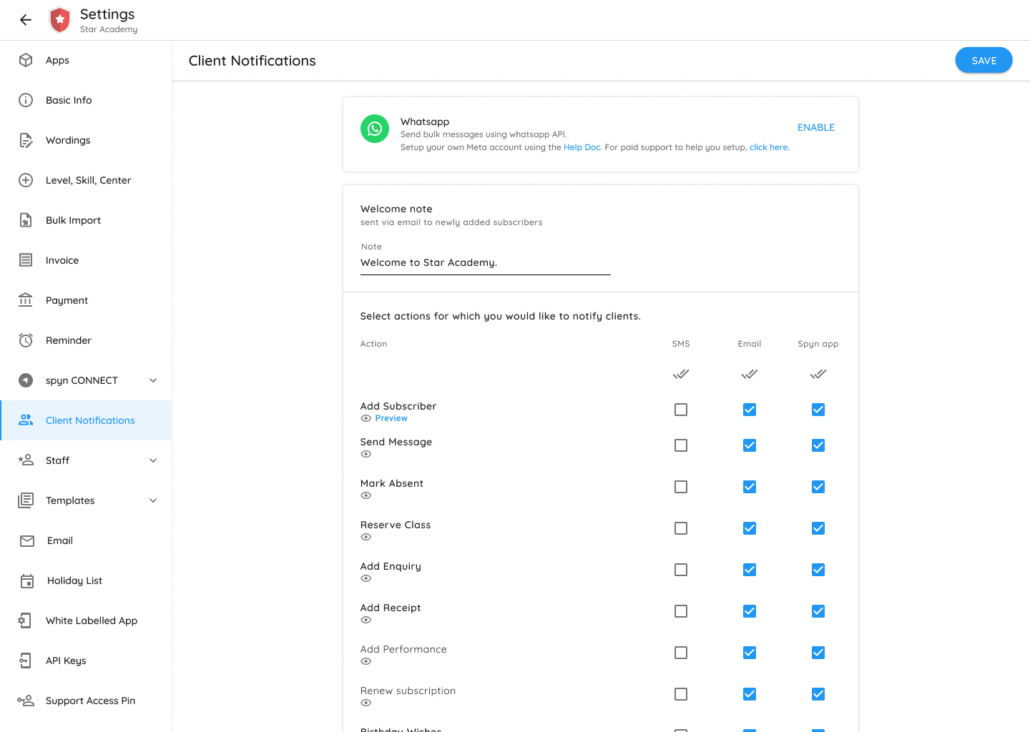
- Click on the ENABLE button.
- Enter your WhatsApp details from above here
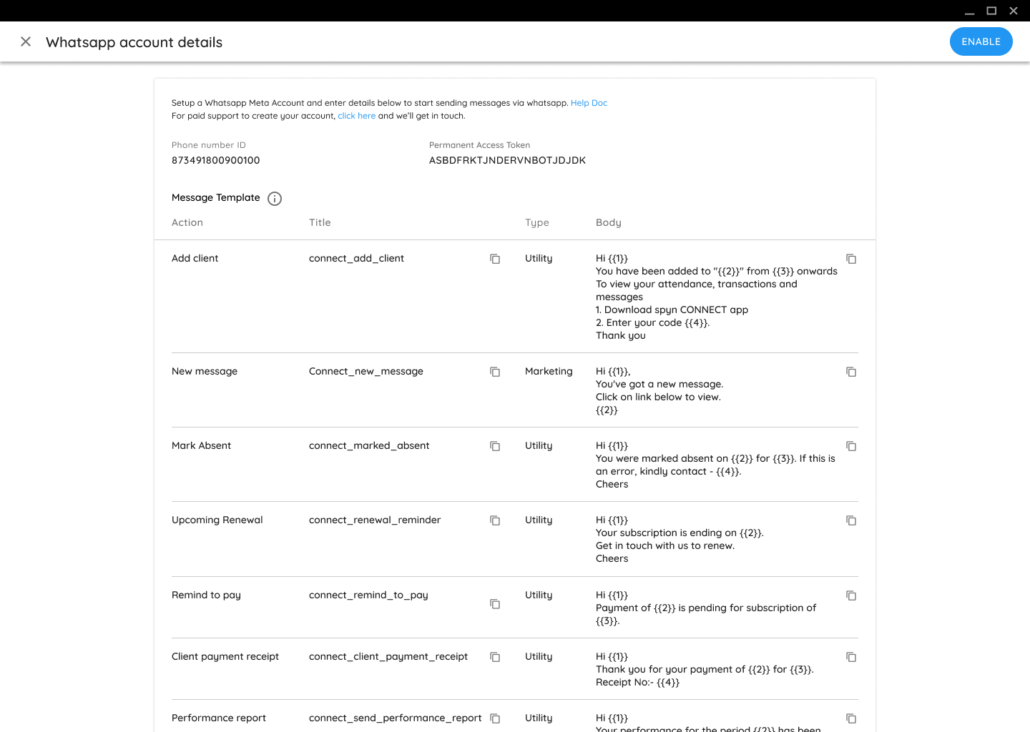
- Add the templates listed on this spyn page into your Meta Whatsapp template section. Select the language as English (Do not select English US or English UK) and type as mentioned against each template. Copy the title and body and enter it. Once you have added all the templates, wait for them to be reviewed and approved. Note that you can optionally add Header and Footer as per your requirement. For ex., you may add a Footer in all the templates letting the user know that this whatsapp account cannot receive messages and they need to message on your other whatsapp number for queries.
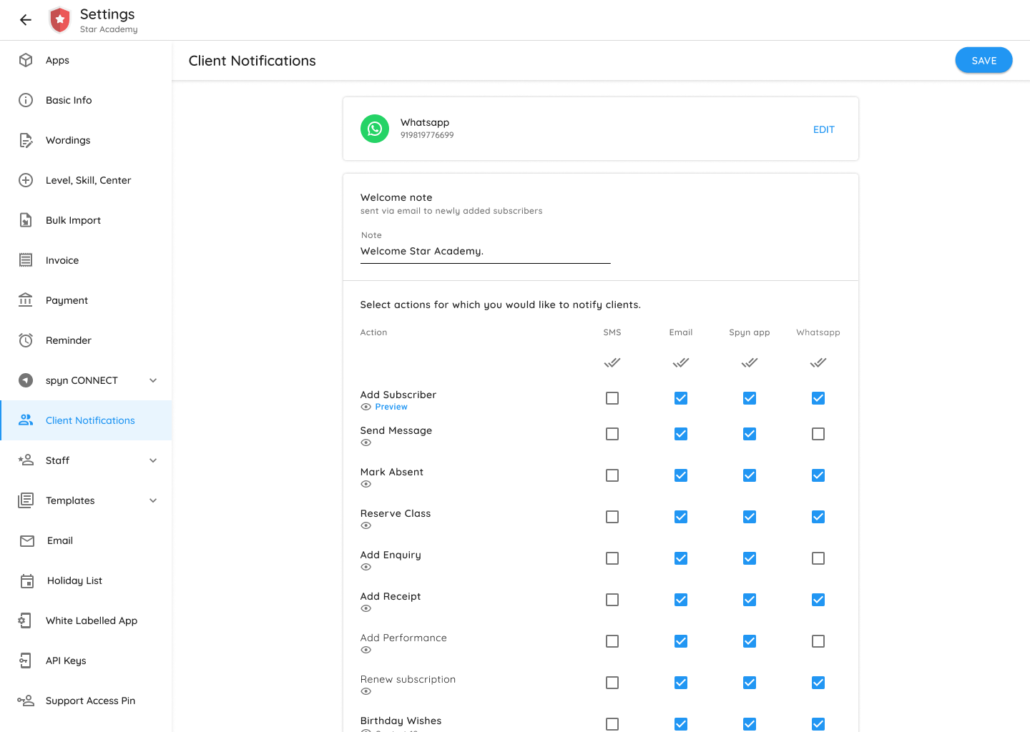
You are now ready to send Whatsapp messages. Enjoy!
Troubleshooting – Common issues
- Your whatsapp phone number needs to be verified
- Your business needs to be verified
- You should have added a payment method – required even if your conversations are going to be within the free limit.
- In spyn settings->Client notifications->Whatsapp, you have entered the whatsapp number ID and not whatsapp number.
- You have added templates exactly as shown in spyn settings and they are approved.
